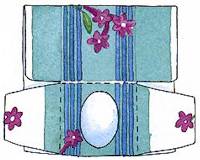
Carefully
pull apart the glued seams of each box so that it lies
flat. Fold the top of one of the boxes over onto one
of the sides so that the pattern is around the oval
and the pattern is on the side facing out.
Cut
around the square top and side of the box to form a
small picture frame. Glue the two sides of the
frame shut, but leave the top open to slide a picture
in. Use the paper clips to hold the cardboard
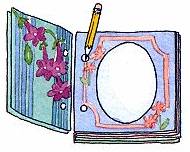
together while the glue dries. Make a least five
picture frames for the album.
To
make the front and back cover for the album, cut four
squares from remaining sides of the box. They
should be the same size as your frame pages.
Glue two squares together, print side out, for the
front of the book. Do the same with the
other two squares to make the back cover of the book.
Use paper clips to hold the cardboard together while
the glue dries.
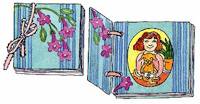
Stack
the covers and album pages together in the order you
want them to be. Punch two holes in the left
side of the cover page. Use a pencil to mark
where to punch the holes in the next page. Keep
doing this until all the pages have holes.
Use
the ribbon to tie two pages together. Tie the
ribbon in a bow on the front side of the album.
Make this gift extra special by slipping a picture of
you into the frame on the first page.