Decorating
material: crayons, markers, stickers, glitter, or paint
What
you do:
If you
want the three frames to be different colors, you'll need
three sheets of posterboard in three different colors.
Help
your child measure six 4"x5" rectangles on the
posterboard. Then let him cut the rectangles out.
To make
the Ds: Stack two rectangles on top of one another. Round off
the upper and lower right hand corners to make the D shape.
Remove
the top rectangle and help your child trace a smaller D shape
in the center, approximately 1" in from the outer edges.
Moms, use the Exacto knife to cut this shape out. This will be
the window of your picture frame. Repeat to make the second D.
Help
your child put a thin stripe of glue around the outer edges of
the uncut D, leaving the bottom edge and the lower half of the
right edge clear of glue. Place the cut D on top of the uncut
one. Press down firmly and let dry.
To make
the A: Stack two rectangles together. Start from about 1½"
in from the top corners and use a ruler to help your child
draw straight lines down to the lower right- and left-hand
corners of the rectangle. This will form the sloping sides of
the A. Cut through both rectangles along those lines. Cut a
small trapezoid out of the bottom edges of both rectangles to
create the bottom of the A.
Remove
the top A and draw a triangle in the center near the top. This
will be the frame's window. Moms, use the Exacto knife to cut
out the triangle. Let your child run a thin stripe of glue
along the outer edges of the bottom A, leaving the bottom
edges clear of glue. Place the cut A on top of the uncut one.
Press down firmly. Let dry.
Measure
and cut three 2" X 4" rectangles out of any color
posterboard to make stands for the frames. Fold the upper edge
of each rectangle down, approximately 1" from the top.
Let your child squeeze glue onto the area above the fold. Now
press the easels onto the back of the frames; the bottoms of
the rectangles should be flush with the bottoms of the
letters. Let dry.
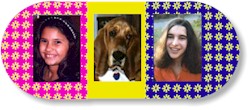
Let your
child decorate the frames with markers, stickers, glitter, or
paint. When he's done, cut a photo to fit each of the windows
and insert them from the open bottom edge. Seal the open edge
with glue.