Put a little Japanese flare into Easter by
making an origami bunny
Origami is the Japanese art of
folding paper. Here's a twist on the Origami frog...it's an Origami bunny
that the kids will really enjoy making this time of the year. All it takes
is a 3 x 5 card and you're ready to begin the project. Just follow each of
these folding steps and glue on a couple of bunny ears at the end, and you're
finished with the project. Should take just a few minutes to make the
bunny!
Place the card in a "portrait" mode.
At the top of the card, take a corner, and fold it down until the top edge
and the side edge meet.
Open card flat
Repeat with the other corner. Now you have an "X".
There should be two creases on the top of your card
If you did these steps correctly, they should form an "X" at the
top of the card.
Make a crease that runs through the middle of the "X"
Mountain fold (fold 'back') the top right through the middle of the
"X"
Collapse the paper on the pre-made creases.
Fold the outer corners of the triangle to the top.
Fold the sides to the middle.
Fold the bottom edge to the top
Fold top edge of the front layer to the bottom edge.
Turn over
Glue (or tape) two bunny ears to the top.
To Make Bunny Hop:
Loosen the front and back legs so that the bunny is
not flat. Tap at the back--and the bunny will jump.
This can be made at a classroom party and filled
with treats for the children to take home.
This
project is rated EASY to do.
What
You Need
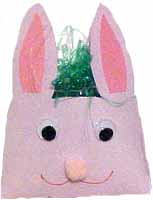
4X6 envelope in pastel
shade
Pencil
Scissors
Pink construction paper
White construction
paper, optional for eyes
Black construction
paper, optional for eyes
Red marker, pen, or
crayon
Wiggle eyes, optional
How To Make It
Lick the envelope shut.
Turn the envelope up
long ways (portrait). Note: Most of the envelope will be ears.
Leave about 2 inches to
draw on the bunny face. Draw on ears and cut around the ears. Note:
This leaves you with a little opening for the grass and eggs.
Cut out inner ears out
of pink construction paper and glue in place.
Glue on wiggle eyes, or
cut eyes out of construction paper and glue in place.
Glue on pom pom nose,
or cut a nose out of construction paper and glue in place.
Draw on mouth with red
pen.
Fill opening with
Easter grass and an egg or goodies.
Tips
You can make the ears larger and the face smaller if you wish.
balloon
tape
1-inch pieces newspaper, newsprint or paper toweling
pie tin
paint brushes
colored tissue paper (optional)
shellac
Paper mache recipe
1 cup water
Mix in 1/4 cup flour until thin and runny
Stir this mixture into 5 cups lightly boiling water. Gently boil for 2-3
minutes. Cool until you can dip paper into mixture without burning yourself.
Eggs
Make paper mache paste as above. When cool pour into pie tin. Blow up a balloon
and tape to a table. Dip strips of newspaper in paste and place carefully on
balloon. Continue overlapping pieces of newspaper on balloon. Cover balloon
completely and let dry. It may take overnight to dry, particularly if you've
used lots of paste. Once dry decorate the dried balloon with paint or colored
tissue in pretty pastel Easter colors. Finish with shellac for a shiny, glazed
effect.
1 large Easter basket
1 lb wheat seed
1 lb vermiculite
plastic wrap or clear plastic bag
Grow a miniature meadow in an Easter basket - it's real simple. A week before
Easter line a large Easter basket with plastic wrap and fill with vermiculite
(about 2-inches deep). Sprinkle wheat seed on top of the vermiculite. Put the
basket in the sink and add water until the seed bed is damp. You shouldn't have
to water it again before Easter.
Set the basket in a pan and place in filtered sunlight. Cover loosely with
plastic wrap or a clear plastic bag to keep moist. Remove the plastic after two
days. The wheat should begin to sprout during the next few days. By Easter
morning you would have real Easter grass to hide your eggs in.
paper plate
pink construction paper
pink and/or white pipe cleaners
yarn
Using the paper plate, cut out eyes and nose in the plate. Cut out bunny ears
from pink paper and glue to the plate. Use pipe cleaners to make whiskers,
attach to plate by poking through and knotting at back, or glue on. Use yarn to
tie to either side of plate to tie on head.
egg carton
cotton balls
yellow food dye
shredded paper (optional)
bits of orange paper
marker
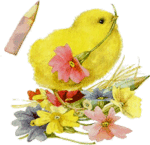
Dip one large cotton ball in yellow dye diluted with water. Let dry. Cut egg
carton so you have one section. Place a bit of shredded paper (color optional)
in bottom of section. When yellow cotton ball is dry draw eyes on top to make
eyes. Cut out very small triangle of orange paper and glue on yellow cotton ball
to make chicks beak. Sit chick in carton section to make the chick in the
basket.
A great way to use up the remains of the Easter eggs.
Colored eggshells
construction paper
crayon, pen or marker
glue
On a piece of paper have child draw a simple design (e.g. flower, balloon, kite,
egg). Spread glue in design area. Sprinkle bits of broken eggshells onto glue.
Allow to dry then hang and enjoy.